Home DIY Projects in Under an Hour... That You Can Be Proud Of
  • Home
    • About
    • Contact
  • EZ Wall Art & Decor
  • EZ Organization
  • EZ Furniture Makeovers
  • EZ Outdoor Living
  • FREE Home DIY
  • EZ Dog Home DIY
  • Blog

Easy Furniture DIY Makeover & Furniture Flipping Ideas in Under 1 Hour

10/14/2022

0 Comments

 
Picture
Find that $5 side table at a garage sale or FREE hutch cabinet at the curb as you walk your dog on trash day that’s not quite your style?

​Or did you inherit furniture from a friend or relative that screams colonial style when your home vibe is farmhouse zen?

​If you are looking for quick furniture flipping ideas or an approach to furniture makeover DIYs in under an hour, you are in the right place!

Don’t like the time and mess of sanding and staining? No worries. If  outdated furniture is in decent condition, here’s a simple DIY approach to transforming those “potential” finds to functional master-pieces in under an hour. My motto is keep it simple with the process and design. Along with less time, mess, and fuss with the process,  this allows for greater design flexibility and compatibility with existing (furniture) pieces in a person's home. 

In this post, I share this approach with an actual furniture makeover that turned into a bigger project... HOWEVER... I was able to complete it in under one hour. Hopefully, these tips help you with your furniture makeover DIYs. Just a hint... 
The key is found in the little details of the piece.

Estimated Time to Complete

Once you have the items needed (which we’ll get to in a moment), allow 5-55 minutes… depending on modifications needed. ​

Level of Difficulty

Easy.

Estimated Cost

Varies... depending on items needed and pulls/ knobs chosen.

Items Needed

  • Furniture object itself
  • Access to internet, bookstore, or library
  • Pulls and/ or knobs
  • Ruler or tape measure​
If needed
  • Screw driver (for removing original hardware)
  • Spray paint (for repurposing hinges, knobs, and/or pulls)
  • Small piece of cardboard (for spray painting screw heads for hinges)
  • Furniture markers & furniture crayons (for minor touchups on wood finishes)
​​​.

Instructions

Picture
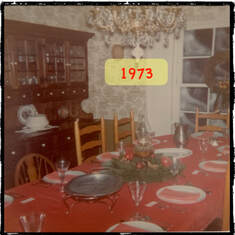
  • Visit websites with furniture of your style for inspiration and visual ideas. As you see in the photo from the early 1970’s, this hutch cabinet had little white knobs with dark hinges on the doors… fitting of the colonial interior design and style of my parents' home at the time. With my style falling into farmhouse and zen styles... for this and other compatible pieces for my DIY style makeover(s)... I found and resonated with https://www.chinafurnitureonline.com.

Picture
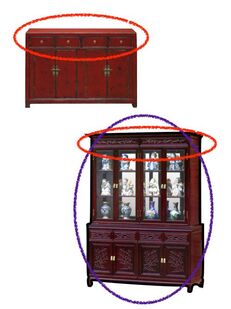
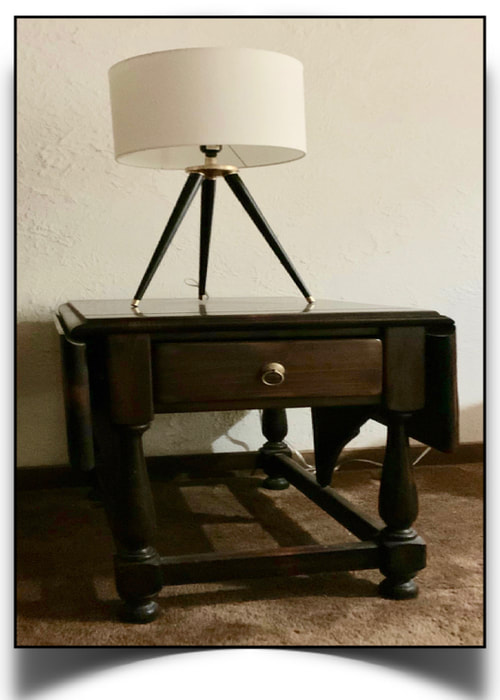
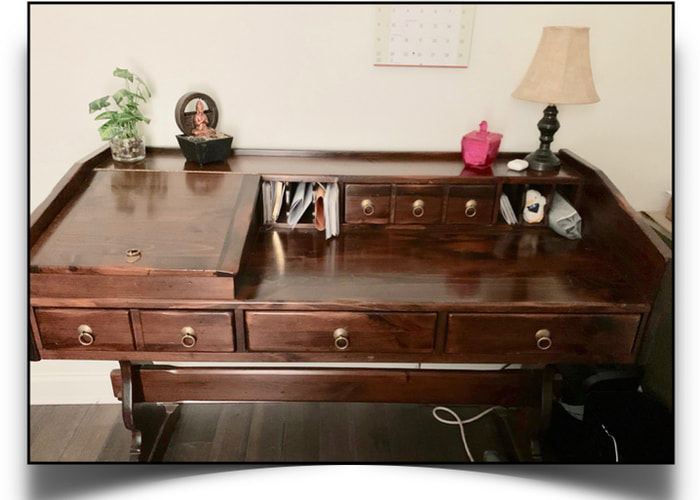
  • Note the similarities between your DIY (furniture) piece “as-is" with the photos of furniture for sale on the site. Look for details such as your piece's shape and wood finish, color, and accessories such as knobs, pulls, and hinges. As you see from the examples, I found knobs, pulls, finishes, and even the shape of the pieces realistic inspirations and ideas for creating a zen vibe with my existing hutch... (and other matching pieces you'll see later). ​

  • Decide what you’re going to revise. Whether preparing furniture to fix and flip for income or the updating for personal use, make a list of what you are going to need… then revisit it hours later. More times than not, I end up simplifying the to-do list. However, with this particular project, I ended up with an extra quick step involving a detail involving a change to the original piece.
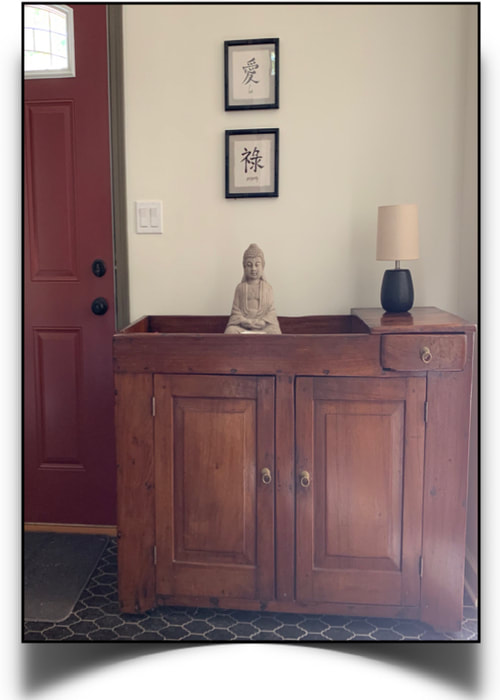
​After viewing the examples from the inspiration site, I found the shape and color of my original piece was compatible with the zen style. However, the white knobs were giving it that colonial vibe. So this makeover focus became about the hardware. I decided to keep the furniture color (with only minor touchups) because the finish was in good condition.

I also considered the additional pieces throughout my home compatible with this cabinet. The thought of sanding and staining or painting them all seemed daunting to say the least. After all, you want to plan for possible future use of similar pieces together. (Okay, maybe that’s just me.)

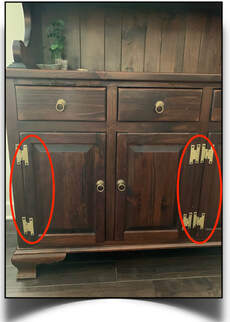
​Back to the  hardware. So I decided to replace the white outdated knobs with brass pulls. However, the existing black hinges clashed with the brass. This lead to that extra quick step I mentioned. Because this piece is over 60 years old, I was hesitant on buying new hinges. Therefore, I decided to spray paint the existing hinges a brass color.


Note: For project requiring repainting surfaces, check out painting furniture post.​
  • Make your list of items needed based on your​ plan. This includes the basic and the “optional items”. In my example, this included knobs and pulls, furniture markers and pens, and brass spray paint for the old hinges.
  • Shop your items. Shop your home first for the screw driver,  tape measure, and even your spray paint stash (if you have one) before heading on the web or to the store. And see Ms. Buttons’ Tip for purchasing knobs and pulls. Psst... Amazon provides the best selection with reputable vendors… where I found pulls that worked on all compatible pieces to the hutch cabinet.
Picture
Things to consider when choosing pulls and pull styles
  • size of pull… don’t want too long where interfering with access to a drawer or door below.
  • size and spacing of hole(s) required for each pull. For me, each pull required only one hole.
  • color of the hinges on the cabinet doors… (although these can be easily changed. ​
​If looking to purchase pulls in-person from a local hardware or decor store, bring the actual pulls with you for sizing. However, you have greater selection and more unique choices from online retailers.
Now it's time to set the clock and get going. Here was my process with a tip from Ms. Buttons' helping you reinvent the style of your find to a functional masterpiece. 

  • Remove the old knobs
  • Replace old knobs with new pulls
  • ​Wipe down hinges with damp and dry cloths
  • Arrange (removed) hinges on surface so you can reattach each hinge to its original location on furniture piece. Although all are probably the same, over time on older furniture, hinges and screws can so slightly change… making reattachment so frustrating.
  • Spray paint hinges. 
  • Paint the screw heads (for hinges) to match color of hinges.
Picture
To paint screw heads (or nail heads), poke nails through a piece of cardboard with the screw head flush with the one side of the cardboard. Spray paint and allow to dry completely before removing and reapplying hinge.​
  • Allow paint to completely dry. (I don't count paint drying in your effort and time.)
  • While paint is drying, touch up wood finishes on china cabinet (and other compatible pieces shown below in a moment).
  • Reinstall hinges to their respective original locations.​​
Picture
Picture
If my mommy were to do this project again, she would have removed and painted the hinges first... allowing them to dry while changing out the pulls and touched up the wood.
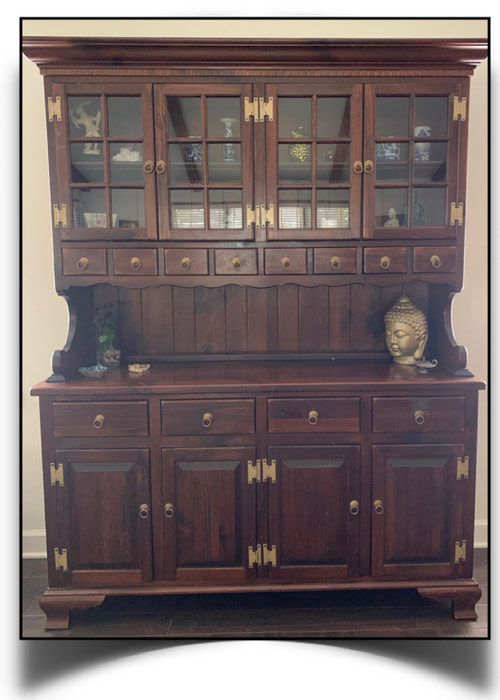
And there you have it!  “New” furniture at a fraction of the cost. By the way, my inspiration pieces from Chinese Furniture Online ran $6,000 for the hutch cabinet and $2,500 for the console/ sideboard. And from those inspirations and the steps I shared with you, I spent less than 1 hours and spent under $150… including the pulls, spray paint, and furniture touchup markers... for multiple pieces! Check out below.​

Just a reminder of the
Before

Picture

After(s)

Picture
Picture
Picture
Picture
Check out more quick furniture flipping and furniture makeover DIY ideas including my post on tips when it comes to painting furniture.

I hope sharing my process with this project helps you save time and money with your furniture DIY makeovers... as you put the fun back into functional stylish living… in under  an hour!
0 Comments

Your comment will be posted after it is approved.


Leave a Reply.

    Picture

    Terri Justina

    The Under-an-Hour, Home DIY Warrior

    ​Ms. Buttons and I share our quick and easy home improvement ideas bringing the fun to functional stylish living. 

    Categories

    All
    Car Care Accessories
    FREE Home DIY Projects
    Furniture DIY
    Home Dog
    Organization Ideas
    Outdoor Living DIY
    Pest Control & Repellents
    Small Dog Living
    Wall Art & Decor

Policies & Disclaimers
COPYRIGHT© · 2023 - 2026 ALL RIGHTS RESERVED 
Picture
Picture
  • Home
    • About
    • Contact
  • EZ Wall Art & Decor
  • EZ Organization
  • EZ Furniture Makeovers
  • EZ Outdoor Living
  • FREE Home DIY
  • EZ Dog Home DIY
  • Blog