Home DIY Projects in Under an Hour... That You Can Be Proud Of
  • Home
    • About
    • Contact
  • EZ Wall Art & Decor
  • EZ Organization
  • EZ Furniture Makeovers
  • EZ Outdoor Living
  • FREE Home DIY
  • EZ Dog Home DIY
  • Blog

Quick and Easy Antique Furniture Makeover Ideas... How to Modernize

10/31/2022

0 Comments

 
Picture
Some say it’s taboo to consider painting and updating antique furniture. But what if  “antique” isn’t your style?
​

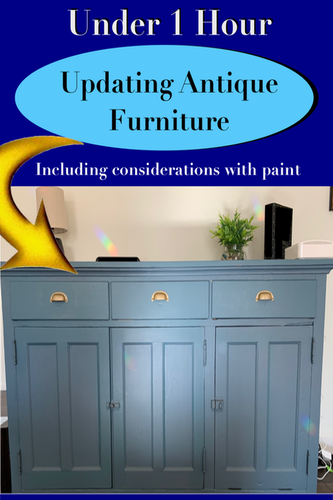
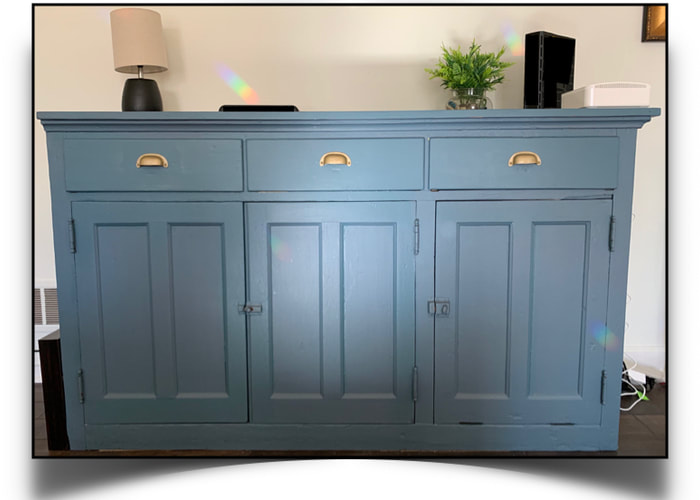
I inherited an antique blue console from my dad’s childhood home.  As with many old pieces, it was solidly built. However, over the years, the piece aged a bit... And it wasn’t quite my interior design style.

This post walks you through my under-an-hour DIY transformational process to what you see today when working with this antique piece including the important considerations when it come to paint. 

Estimated Time to Complete

Once you have the items needed (which we’ll get to in a moment), 15-55 minutes… depending on modifications needed.

Level of Difficulty

Easy.

Estimated Cost

Varies depending on items need.  For this project, under $30.

Items Needed

These were the common supplies needed for my project:
  • The old furniture piece
  • Access to internet… or bookstore, or library
  • Indoor Paint (which I’ll get to in the instructions)
  • Spray Paint (which I’ll get to in the instructions)
  • Screw driver/ tools (for removing original hardware)
  • ​Small piece of cardboard (You'll see!)
Here are additional common supplies I've needed for similar projects: 
  • Pulls and/ or knobs
  • Ruler or tape measure
  • Furniture markers or furniture crayons (for minor touchups on wood finishes)
  • Stencils

Step-by-Step Instructions

Visit websites with furniture of your style for inspiration and visual ideas. Before gathering a single item…. I take to the internet to check out a few websites featuring furniture pieces (for sale) in my desired design style. If your style is modern or Scandinavian for example, then find sites that feature your furniture and interior design style.
My style happens to be farmhouse zen so I’ve found https://www.chinafurnitureonline.com best jived with my aesthetic interior vibe.
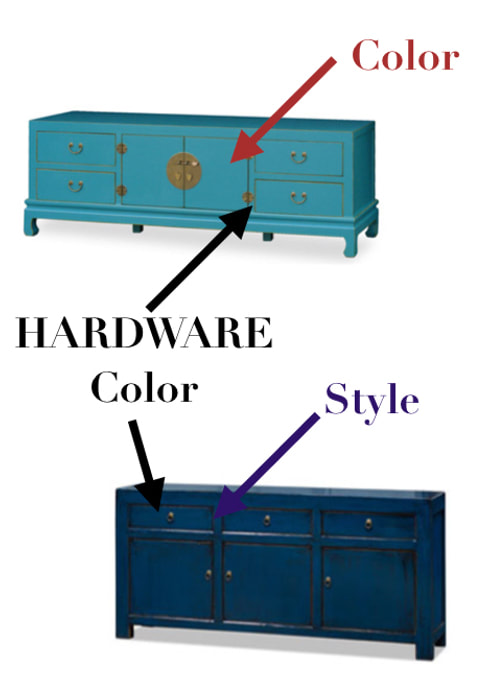
Identify and list the similarities between your original furniture find and the inspiration pieces. Look for details such as
  • shape and lines of the piece
  • color... (Is the current color timeless or compatible to your style?)
  • hardware... including hinges, knobs, and pulls​ ​
Picture
Picture
Don’t ignore the structural integrity of a furniture piece. Because we are looking to keep our projects under an hour, we need to be a bit pickier.
Decide what you’re going to revise. This includes
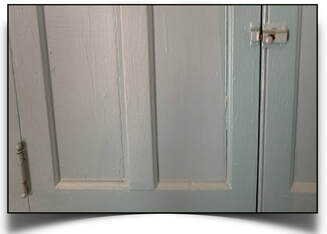
  • The shape of the piece is the same as the inspiration pieces. The inspiration pieces have 2 -3 inch legs at the bottom. My console does not... AND I can live with that.
  • The overall color and finish of the piece including the amount of the piece requiring a repaint and touchups… and age of the paint. The console’s blue paint is inline with my desired zen style (which actually surprised me). However, an even bigger issue is the age of the paint and an odd-color drawer someone repainted a color that didn’t exactly match the remainder of the piece. This piece was painted prior to 1978… before lead-based paints were banned from residential use in the United States. So I decided to repaint the funky-color drawer and do a few painting touchups with a color-match to the remainder of the piece… which I’ll get to in a moment.
Picture
Any sanding, scraping, chipping, or other forms of friction against a lead paint surface can release particles of lead dust into the air. Instead, simply wipe down the existing surface with a warm, wet towel to prepare it to be painted over. Yes, it’s safe to paint over lead paint. The new paint actually forms a barrier against the toxins in the lead paint releasing or chipping… if the old finish is in good condition.
Picture
  • The original hardware such as pulls, knobs and hinges were the style I wanted. The knobs and hinges were a color match to the piece which made style sense for me. As for the drawer pulls, the shape matched what I was seeing on similar pieces, but, their original black matte finish did not reflect the brass color on the inspiration piece. And with the hinges and pulls blending in with the blue paint… I needed some hardware to aesthetically  pop and stand out amongst the monochromatic blue.

Picture
If your project includes new hardware, here are a few things to consider when choosing pulls and pull styles:
  • size of pull… don’t want too long where interfering with access to the piece's other drawers or doors.
  • size and spacing of hole(s) required for each pull. 
  • color of the hinges on the cabinet doors… although these can be easily changed. 
  • Start by shopping your home supplies. I shopped my stash of spray paints and paint brushes, as well as protective floor covering for my floor and painting area. ​
Picture
  • Shop your local paint store "prepared".  Because I am color-matching and not fully repainting the console, I made a field trip to the local paint store with a drawer with the desired paint to match in tow.

The store’s "paint mixologist" can exact-match the paint including the paint’s finish that changes with age. What was originally a high gloss finish when painted years ago may now be more of an eggshell as with my piece. And because I was unable to sand-prep the odd-color drawer due to the lead paint risk, I chose a primer/ paint combo. 

Now it time to get going!!!
  • Place protective floor where needed
  • Remove old pulls
  • Clean piece and pulls with damp and dry cloths
  • Spot paint including painting discolored drawer
  • Spray paint pulls (See Ms. Buttons’ Tip)*
  • Reinstall pulls
Enjoy!
Picture
Picture
To paint screw heads (or nail heads), poke nails through a piece of cardboard with the screw head flush with the one side of the cardboard. Spray paint and allow to dry completely before removing and reapplying hinge.
Check out more quick furniture flipping and furniture makeover DIY ideas. 

I hope sharing my process with this project helps you save time and money with your furniture DIY makeovers... as you put the fun back into functional stylish living… in under  an hour!
0 Comments

Your comment will be posted after it is approved.


Leave a Reply.

    Picture

    Terri Justina

    The Under-an-Hour, Home DIY Warrior

    ​Ms. Buttons and I share our quick and easy home improvement ideas bringing the fun to functional stylish living. 

    Categories

    All
    Car Care Accessories
    FREE Home DIY Projects
    Furniture DIY
    Home Dog
    Organization Ideas
    Outdoor Living DIY
    Pest Control & Repellents
    Small Dog Living
    Wall Art & Decor

Policies & Disclaimers
COPYRIGHT© · 2023 - 2025 ALL RIGHTS RESERVED 
Picture
Picture
  • Home
    • About
    • Contact
  • EZ Wall Art & Decor
  • EZ Organization
  • EZ Furniture Makeovers
  • EZ Outdoor Living
  • FREE Home DIY
  • EZ Dog Home DIY
  • Blog