Home DIY Projects in Under an Hour... That You Can Be Proud Of
  • Home
    • About
    • Contact
  • EZ Wall Art & Decor
  • EZ Organization
  • EZ Furniture Makeovers
  • EZ Outdoor Living
  • FREE Home DIY
  • EZ Dog Home DIY
  • Blog

Custom Frame Matting DIY Tutorial

4/5/2023

0 Comments

 
Picture
A photo frame wallpaper background creates a one-of-a-kind photo frame design boarder for a photo.

Custom frame matting provides a resting place for the eyes and visual separation between a photo and its surroundings. It can also create a themed gallery of photos telling a story of a place, time, or group of people... 
sparking fun memories and conversations.
Professional framing is costly. And buying matting can be frustrating in the time and money trying to find the color or size you want.

My prior post covered unique frame matting ideas with the use of image stamps to further tell a photo's story. 

So this post too provides the easy, steps for framing photos displayed not only on your wall or nightstand but in digital photo albums and digital photo frames, as well as for scrapbooking pages.

Estimated Time to Complete

Once you have the items needed (which we’ll get to in a moment), easily under 20 minutes.

Level of Difficulty

Easy.

Estimated Cost

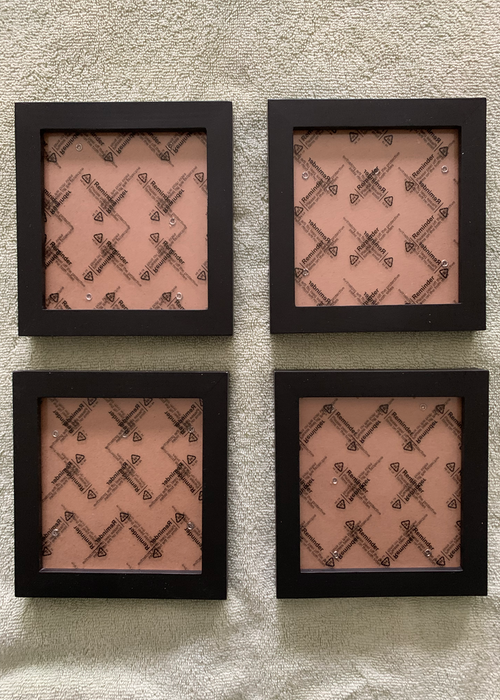
Depends on the frames you choose.  For this project, I pulled from a set of 4 frames that I purchased for under $20.
Picture
I recommend purchasing (matching) frames typically sold in sets of 4. They’re less expensive. And most projects involve multiples or grouping of “like” photos or images… even if at a later date to build upon.

Items Needed

  • Desired Photo(s) to frame
  • (Set of) picture frames or pull from a set of simple frames you have already. Because of the busyness of the matting you’re creating, I recommend choosing frames with simple lines as shown.
  • Computer with Pages App (or similar apps with simple graphic design capabilities that you could create a flyer with)
  • Scanner or smart phone
  • Printer
  • White paper (8.5 x 11”)
  • Scissors
Picture
Recommend choosing simple frame designs for customized matting projects.

Instructions

  • Choose photo (or photos) to frame. I pulled photos that are clearly from specific eras for demonstrating the power of creating a photo frame wallpaper background for furthering the story of the photo itself. For this post, I chose two from Ohio: one of my mom taken in the 1950s and one of me in the mid 1960s.
Picture
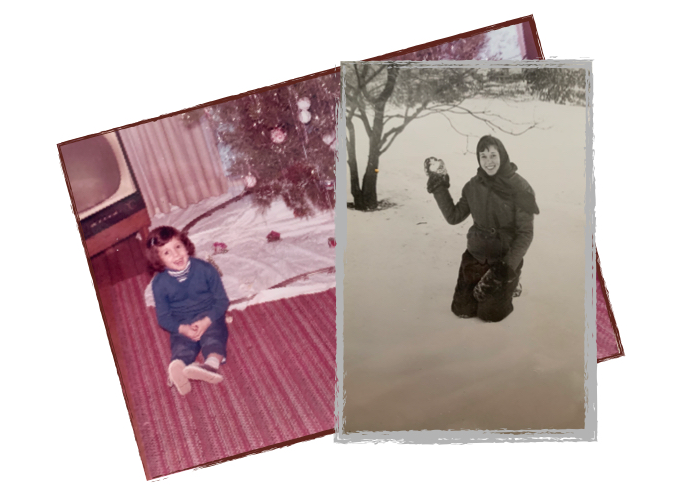
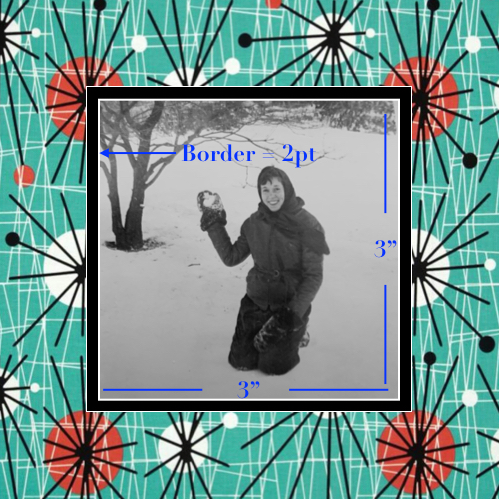
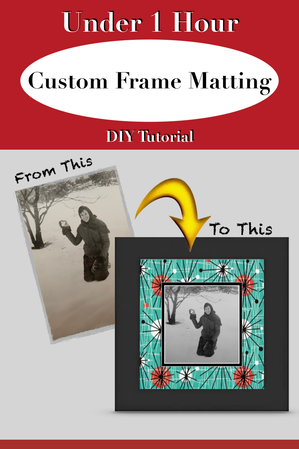
I’ll walk you through the process of creating custom matting wallpaper and framing for each photo separately… Starting with the photo of my mom in the snow.
  • Choose matting wallpaper design. This can be a background sheet for scapebooking, a favorite fabric, a design found online… in other words, your resources are endless. As with the matting image stamp from my prior post, the design should help tell the story of the photo. 
Picture
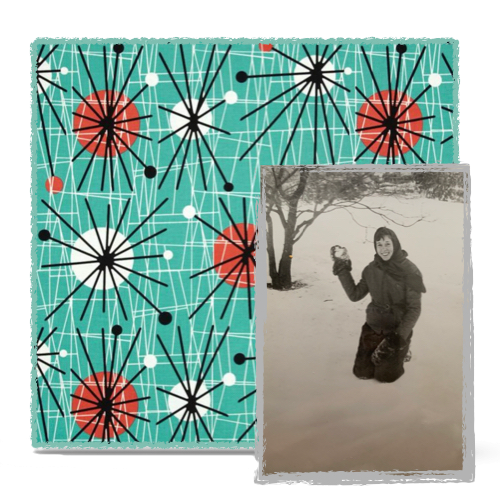
I chose a retro 1950’s print to reflect the era of the photo.
  • Upload your photo to your computer desktop (or smartphone) for editing. Because I don’t have a scanner, I took a photo of the picture I used for this project and airdropped (uploaded) it from my phone to my laptop.
  • Upload your matting wallpaper to your computer desktop (or smartphone) for editing. ​

Edit Wallpaper (First)

Step-by-Step instructions based on using "Pages" App on my MacBook Pro or similar apps with simple graphic design capabilities (that you could create a flyer with).
  • Open new Pages  document choosing a blank template.
  • Drag & drop matting wallpaper image into document.
  • Size the wallpaper to the dimensions of the frame display opening. This will also serve as a guide for positioning and placements within your frame display. For this project, I cleaned up and cropped the wallpaper image to fit my frame display opening and matting dimensions are 5” x  5”.
  • (Optional) Center this image in document. This simple step will make your life easier during the process. ​
Picture
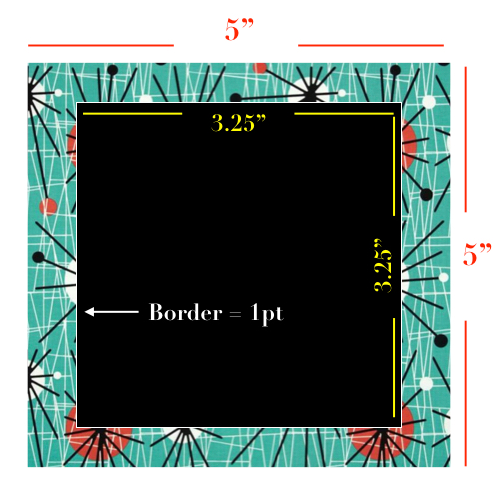
Dimensions for this example based on frame display of 5" x 5"
Picture
  • Create depth in the matting.  Unlike with stamp image matting designs where the boundaries of the matting and the photo are clearly defined, we need to provide definition of where the design of the matting ends and the photo begins.
    • Create and center smaller shape with same proportional dimensions as the matting design image to create illusion of “cut depth”. With the  matting dimensions of 5” x 5”, my depth image dimensions are 3.25” x 3.25” to show off more of my matting design.
    • Create depth illusion. Color fill for “depth” in this example is a black with a white 1 pt. border… compatible with the design of my matting wallpaper.

Picture
Typically, mat board (also known as paper mat board) is made of wood pulp. This type of mat board, also known as paper mat board, is the most common and least expensive.

Edit Photo

  • Drag & drop photo image into document.
  • Cleanup and crop boarders, sizing photo to smaller yet the same proportional dimensions of the display. In this example… with the display is 5” x 5”,  the (black) matting depth image is 3.25” x  3.25… so I cropped my mom’s photo to 3” x 3”. The photo border is of the same color as the dimension shape boarder but a slightly thicker... 2 pt. ​
Picture
  • Adjust photo’s color and exposure. This is where you use those visual filters including color saturating and tinting for compatibility with matting wallpaper. This photo needed a  slight tinting adjustment for its compatibility with the coloring of the matting wallpaper.
  • If necessary… Adjust matting’s color and exposure. In this example… as with most of these type of projects… I kept the matting wallpaper as-is.

Ready for Display

  • Print on white paper. Note: If printed on blue paper, lighter parts of image can come out blue.
  • Lay glass over photo with matting and mark trim lines.
  • Trim to display size.
  • Insert in frame.
  • Display and enjoy.
Picture
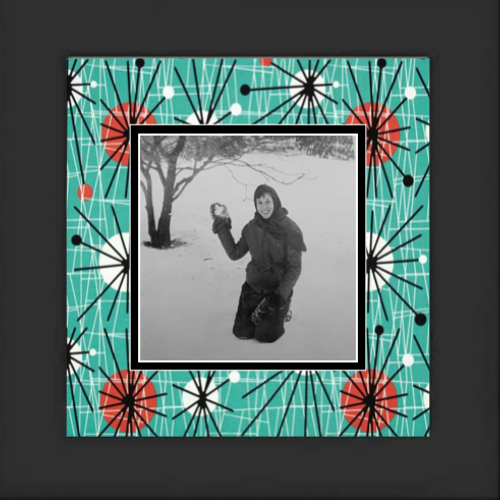
The matting choice enhances the story of the photo artistically indicating the era of the photo.

Before Leaving this Post...

I love the clarity and simplicity of black and white photos with their adaptability to fit in any interior home design.

​However, I want to share one more example of pairing matting wallpaper with a photo and its subject that is a bit more involved. Although this too can easily be completed in under 1 hour, it will probably require more than 20 minutes.


So let’s return to the photo below of me from the mid 1960s in my childhood home. We follow all of the same step as we did with my mom's project. But, let’s take a closer look at the compatibility of the photo with the matting.
Picture
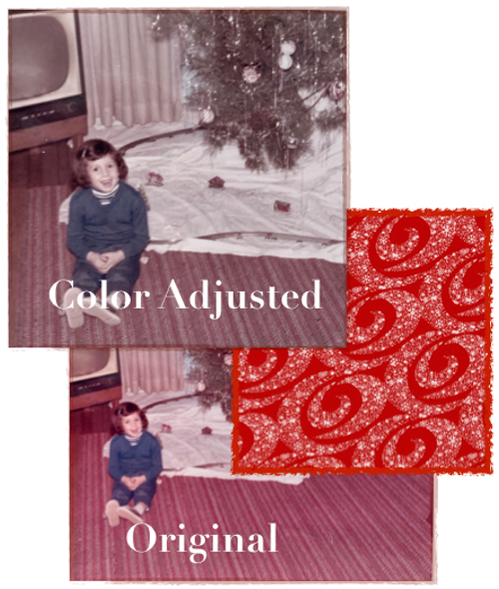
Although my clothing and the old television provide a symbolic timestamp of the 1960s, I didn’t want to lose the popularity of the bold warm tones found in homes of that era. So I decided to slightly reduce the color saturation just enough to take the edge off clashing with the matting.

​And because this is more of a seasonal photo displayed late November through December, I was willing to take more risks in terms of color compatibilities, particularly with red being one of the “it-colors” of that season.
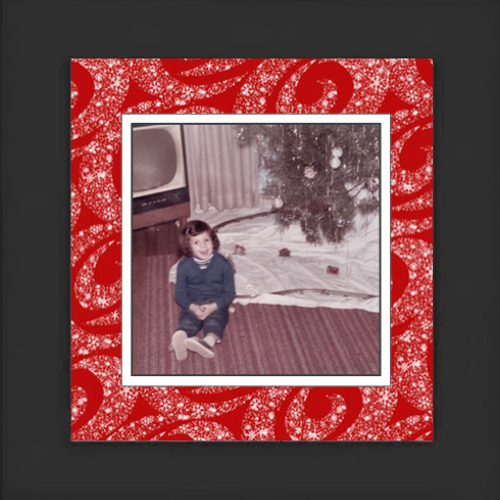
Picture
    Built with ConvertKit
    0 Comments

    Your comment will be posted after it is approved.


    Leave a Reply.

      Picture

      Terri Justina

      The Under-an-Hour, Home DIY Warrior

      ​Ms. Buttons and I share our quick and easy home improvement ideas bringing the fun to functional stylish living. 

      Categories

      All
      Car Care Accessories
      FREE Home DIY Projects
      Furniture DIY
      Home Dog
      Organization Ideas
      Outdoor Living DIY
      Pest Control & Repellents
      Small Dog Living
      Wall Art & Decor

    Policies & Disclaimers
    COPYRIGHT© · 2023 - 2025 ALL RIGHTS RESERVED 
    Picture
    Picture
    • Home
      • About
      • Contact
    • EZ Wall Art & Decor
    • EZ Organization
    • EZ Furniture Makeovers
    • EZ Outdoor Living
    • FREE Home DIY
    • EZ Dog Home DIY
    • Blog